A Tale of Three Atari ST Power Supplies
I’ve got three 16/32-bit Ataris that I’m currently working on: two Atari 520 STEs that I acquired a while back, and the most recent addition, a Falcon 030. Both STEs are UK models, and expect that the mains power is operating at a 230V nominal voltage. US mains voltage is 120V, so that won’t work. I didn’t want to rush into replacing the power supply, so I purchased a step-up converter from Amazon, which allowed me to use the STEs until I was ready to upgrade them.
When you buy through a link on this site, I may earn a commission.
Computer power supplies are extremely hazardous. Heat sinks and other power supply components often carry live voltage. Power supply capacitors will hold hazardous voltage levels long after the computer is turned off. I found the iFixit safety guide to be helpful.
Atari 520 STE #1
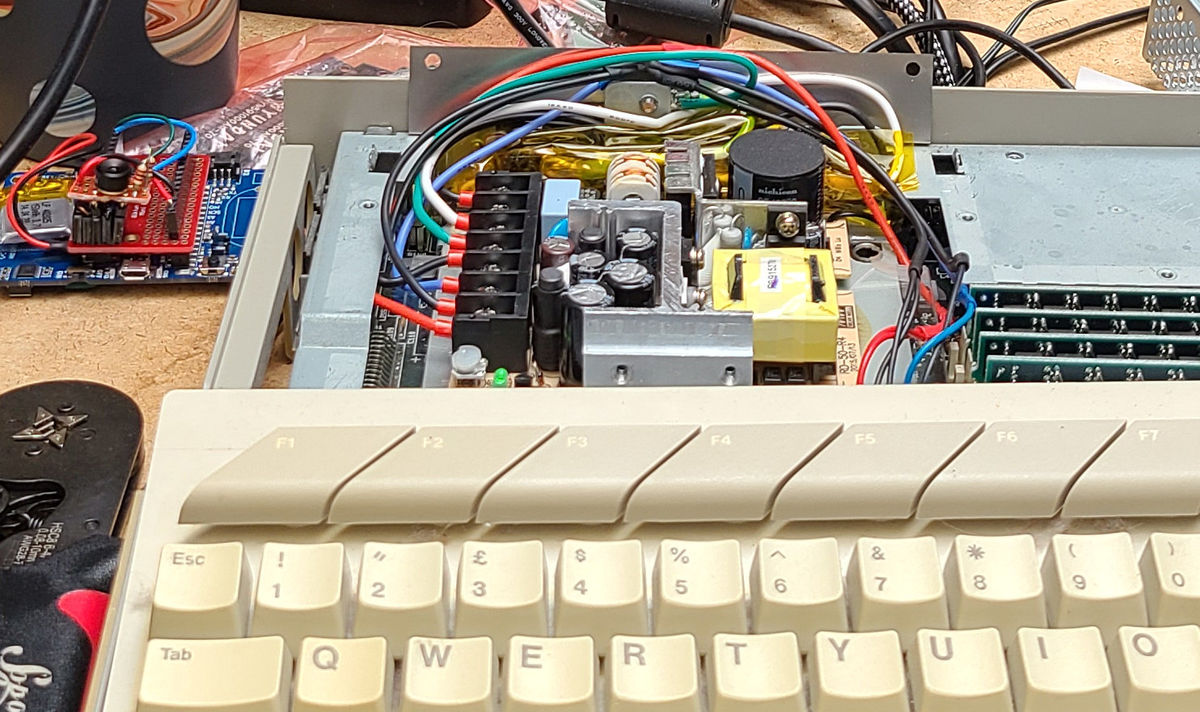
For the first STE upgrade, I went with the Mean Well RD-50A, which is a popular choice for older computers and video game systems. It’s pictured above at the top of this post, and it will operate on most, if not all, worldwide mains voltages.
This installation was not an experience I’d care to repeat. The RD-50A does not fit well in the Atari ST. It is slightly too big, and I had to bend the leads on the switch and AC plug socket to give myself enough clearance to fit it in. It took a tremendous amount of time to get to fit, but I was pleased with the result, especially because this gave me enough space to replace the power supply RF shielding that came with the STE.
I found this video from Jan Beta to be immensely helpful in preparing me for this power supply upgrade. I watched the power supply section several times before and during the process.
I crimped ferrules onto the wire leads before I screwed them into the terminal block. I’ve had too many bad experiences with tinned wires in screw terminals, including a melted terminal block on a 3D printer that turned into an expensive controller board replacement. I used this ferrule crimp kit + tool from Amazon. This Hackaday article explains the importance of ferrules.
Atari 520 STE #2
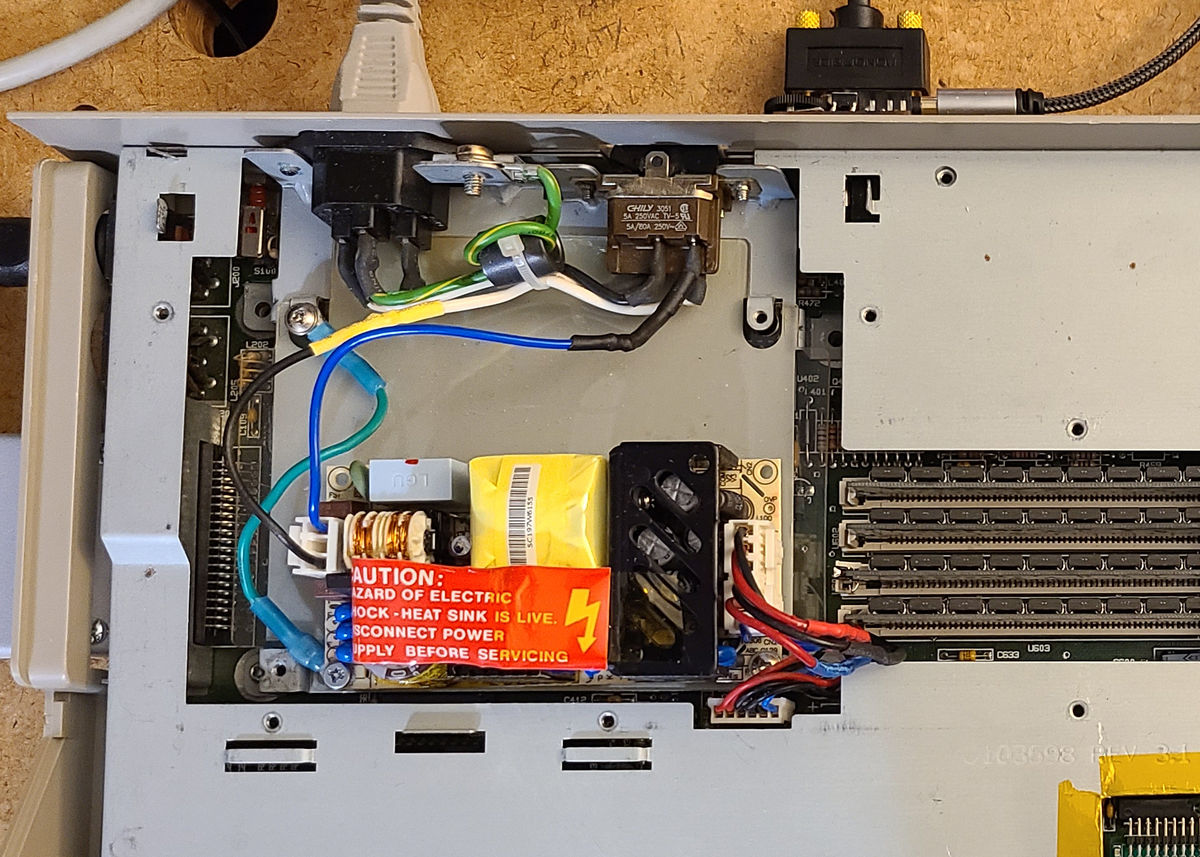
When I got around to upgrading the second STE, I looked into alternatives to the RD-50A, and found this AtariAge thread from 6BQ5 that recommended a different Mean Well power supply, the RPA-60A. It’s much smaller and far easier to install. Despite the 60 in the model number, and the 60W in the description, digging into the datasheet shows that it’s rated for 49W (vs 54W for the 50A), and can deliver 5A on the 5V rail and 2A on the 12V rail, which is plenty for this machine.
By using the cable assemblies recommended in 6BQ5’s post, the installation ended up being quite easy. The smaller size of the power supply made it much easier to install than the RD-50A. It didn’t align well to the screw holes in the power supply bracket, so I bolted a wire from one of the grounding screw holes to a screw hole in the bracket. This ensures proper grounding to the case. That connection is visible in the photo above.
Falcon 030

My Falcon 030 is a US model, so technically, I didn’t really need to upgrade the power supply. However, the original power supply runs hot, and I really wanted to cool things down so I could feel more comfortable about disconnecting the internal fan, which is really noisy. So, I splurged on the STPSU r2022 power supply unit for Atari Falcon030 from Centurion Technologies. Even though it was listed as on backorder, it took only a few weeks to arrive.
This was by far the easiest upgrade because it is a plug and play replacement. No soldering needed at all. My only gripe was that I wasn’t able to get both grounding screws attached (see the lower right screw hole in the photo). It’s probably because my power supply bracket is bent or something. However, the grounding is quite secure, so I’m not too worried. Though I’ll probably open it up some day and sort out the misalignment because it will always nag at me.
Tagged atari-st, power-supply, atari-falcon-030